Guide - Creating Parent Accounts
* The following steps are only available to Admin Users. *
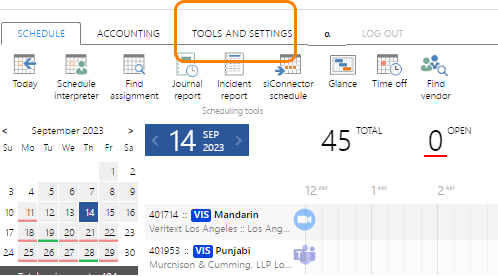
1. Go to Tools and Setting Tab
Navigate to the top menu in ScheduleIntepreter.
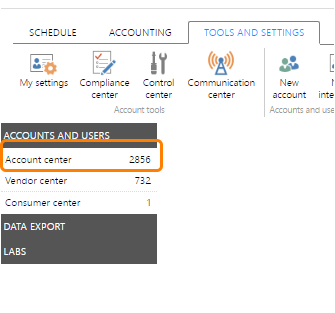
2. Navigate to Account Center
View the sidebar menu under Accounts and Users.
- QUALITY CONTROL CHECK
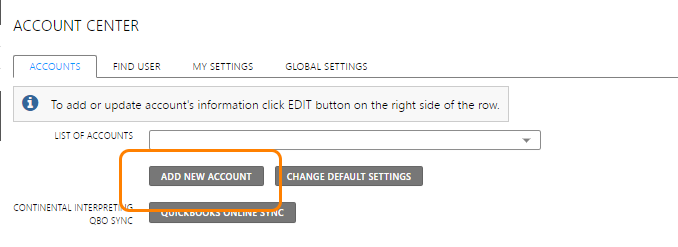
Key in the name of the account you will be adding before adding the account. This is to double check that the account is not already in our system and will prevent any duplicates. If nothing comes up, proceed to the next step.
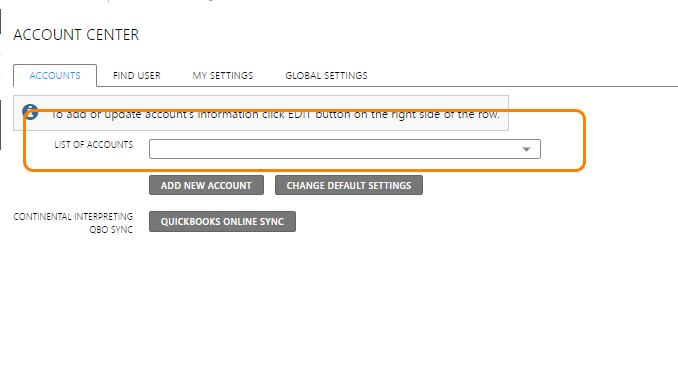
3. Select Add New Account
* Tip: Gather all account information ahead of time to make this step more efficient *
4. Fill Out Necessary Fields
* Do not click on Sub Account *

- ACCOUNT NAME
- Enter the name and city with a dash as a separator (Example: Account Name - City)
- ACCOUNT NAME QUICKBOOKS
- This will be generated automatically and should remain blank. Disregard unless instructed to overwrite the default.
- ACCOUNT TYPE
- Choose an option that states the type of organization only (not including "Rates" or other information), such as "Law Firm," "Insurance Company," "School District," or "Court Reporting Agency."
- COUNTRY
- By default, this will be United States.
- ADDRESS INFORMATION
- Fill out street address, suite, building floor, city, state, zip code
- TIME ZONE
- Be sure to select the correct time zone as clients could be in other time zones.
- LOCATION IS OBSERVING DAYLIGHT SAVING
- This is checked by default. Leave as is unless instructed to change.
4. Submit
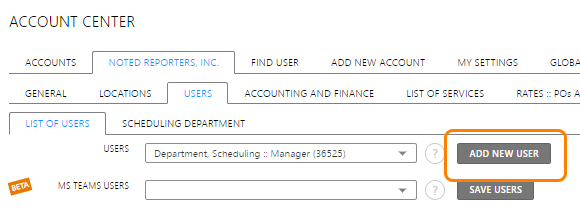
5. Navigate to Users Tab
You will add Users (Client Contacts) in the following tab. This is the only place where you can manage Users (i.e. Requester, Attorney, etc).

To add a new user, select Add New User.
The following is an example of a completed User profile with all the necessary fields and correct formatting.
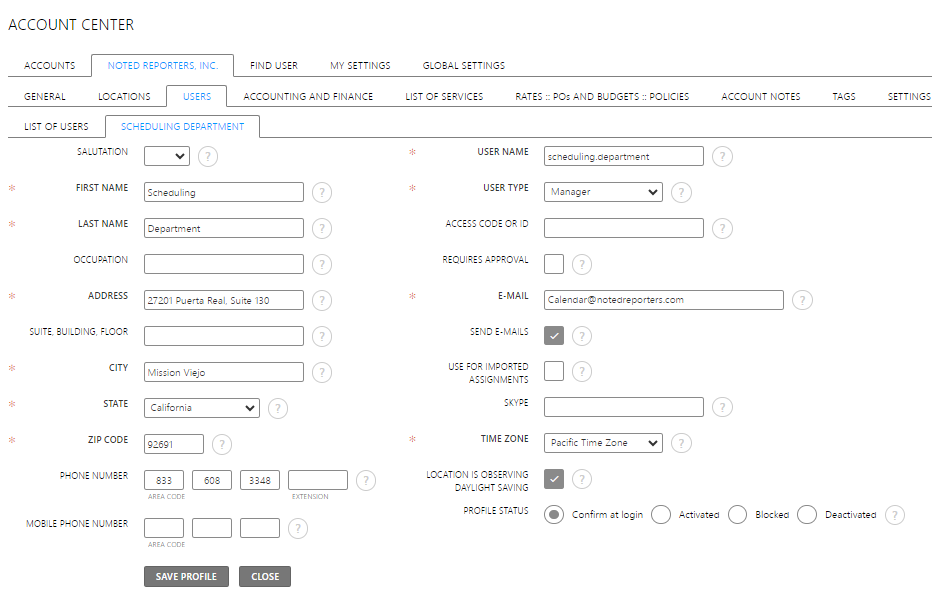
- FIRST NAME, LAST NAME, ADDRESS, CITY, STATE, ZIP CODE, PHONE NUMBER
- Fill this out as usual
- You will notice in the example above, that the User profile that is used for a Department here is the Scheduling Department.
- USERNAME
- Follow this format: first name.last name (i.e. "scheduling.department" for the example above)
- USER TYPE
- Always enter "Manager" for the User Type.
- EMAIL & SEND E-MAILS
- Enter the email as usual
- Be sure to select "Send E-mails" or the User will not receive automated notification messages from SI.
- TIME ZONE
- Fill out as usual.
- LOCATION IS OBSERVING DAYLIGHT SAVING
- This is checked by default. Leave as is unless instructed to change.
- PROFILE STATUS
- Choose "Confirm at login"
- PASSWORD SETTINGS
- You will need to set up a password for the new account.
- Copy/paste the following into both Password and Confirm Password fields: Si2023.onbrd
** After you review the above, you can click Save **
6. Review Settings (Documents and Conference Platforms) Tabs
Navigate and complete the following to finish setting up the Parent Account.
- DOCUMENTS > INTERNAL SERVICE REQUEST TEMPLATE
- For Calendar/Legal, confirm that this form is set to "Legal Interpreting"
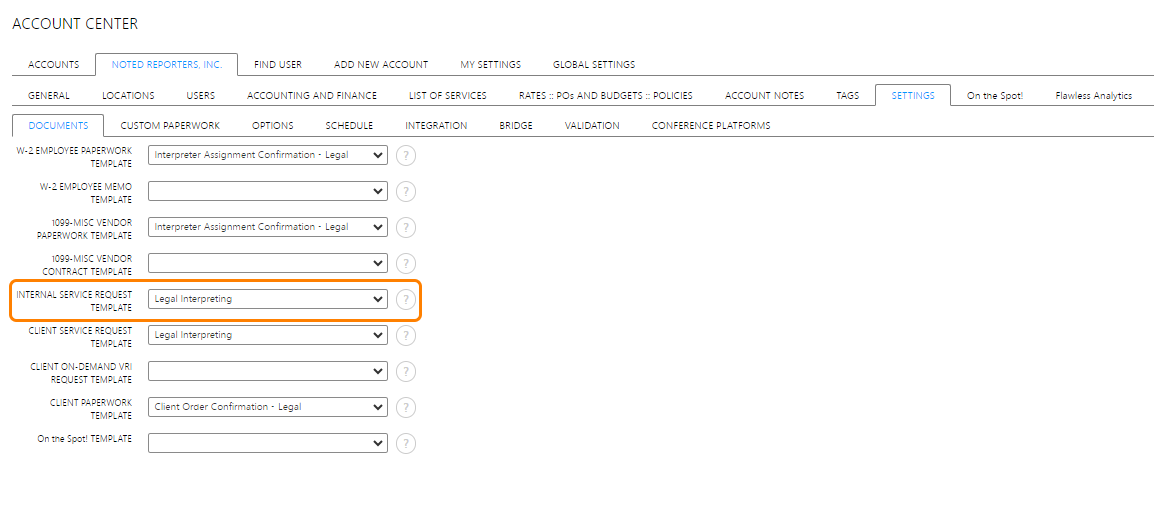
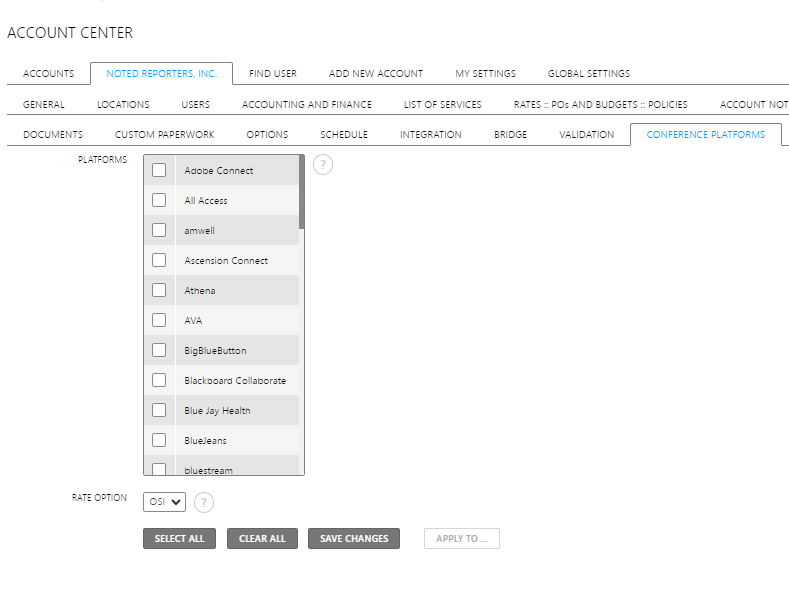
- CONFERENCE PLATFORMS
- The following platforms will be added automatically: Google Meets, Microsoft Teams, RingCentral, Zoom. Review that this looks good before saving your changes.